A router table can take your DIY skills to the next level. I built one quickly using some scrap wood and an ad-hoc setup with my handheld router. It ended up being far from as sturdy as I wanted and also very impractical when changing router bits, adjusting height, etc. In addition, it didn’t have a fence or any built-in clamping system. So I decided to build a better one.
For the new router table I used the experience from the first version to set up some goals:
- It should be really solid and sturdy
- It should be easy to adjust height and change bits
- It should have a fence and some t-tracks for clamping
- It should be tall enough to be able to work comfortably while standing
Building a good DIY router table takes a bit of work, but when it’s done you will benefit from it in many projects!
I got some inspiration for this design from this Stumpy Nubs video, so thanks to Stumpy Nubs for many great videos!
Sketching and cutting the router table parts
I started with sketching up the frame using SketchUp. Since I had never used the program before, I spent some time learning the basics. After a while I sort of got the hang of it.

As you can see, it is quite tall. This is on purpose in order to allow a comfortable working position for back and shoulders.
I decided to use regular 2-by-4 construction lumber for the frame. I also decided to use tenon/mortise for joining the pieces. I would be regretting that halfway through 24 tenons and mortises later on, but it seemed like a good idea at the time, to make it as sturdy as possible.
I started by cutting the main pieces for the frame:
- Legs: 4x 116.5cm / 46 inches
- 4x 70cm / 27.5 inches
- 6x 40cm / 15.75 inches
- 2x 80.2cm / 31.5 inches
I did not realize that the two support pieces in the middle needed to be longer than the other pieces in the width direction, so I accidentally cut them too short (70 cm/27.5 inches instead of 80.2cm / 31.5 inches). More on that later.
As a newbie woodworker, I lack the tools, experience, and skills to make good tenons/mortises. I thought by making a lot of them, I would develop a good routine and get some good practice, but I quickly ran into challenges.
Cutting the tenons
Starting with the tenons, I first used a marking gauge to mark up where I was going to cut. I decided to go for a 16mm (1/3 of the depth) thick tenon, and remove the same amount of material from each side. This should give me a tenon of 16mm x 66mm, or about 2/3 inch x 2 2/3 inch. The height would be 48mm/2 inches for a through mortise.

I first made the cuts for the shoulders (red line) using a track saw set to a precise depth. That wasn’t too hard, although doing it 24 x 4 times took some time. Then it was time for the cheeks/haunches (blue lines). If I had owned a table saw or a bandsaw, this would have been piece of cake. But since I don’t, it became a challenge. I first tried doing it by hand using my Japanese saw. That took forever and didn’t produce an accurate result. I needed to change my tactics.
The next attempt was using my track saw, by creating many cuts parallel to the original cut on the red line, and then removing the remaining material by either breaking it off or using a file or a plane. It sort of worked but was very inefficient, generated a lot of sawdust and I was not happy with the result either.
I considered creating a router jig, but discarded the idea since it would be too hard without a router table.
I ended up creating an extension to my first router table that allowed clamping the pieces vertically, and then using my track saw directly on the end-grain at maximum blade depth. It was still a lot of work, but much more efficient than the other techniques. The tenons were not completely accurate, but after finishing 24 tenons I really did not care. I am definitely getting a bandsaw or a table saw!
Creating the mortises
After cutting 24 tenons, I was happy for a short while, until I realized I had to create an equal amount of mortises. I also had another challenge: Because I did not manage to cut identical tenons, some were thicker or wider than others and I would have to adapt the mortises according to depth/width. Because of this, I made sure to write numbers on every joint location so that I could easily see which tenon should fit into which mortise.
The legs would contain 6 mortises each, 2 for each corner. That means there would be one through mortise, and another 4.8cm/2inch mortise perpendicular to each other

For the supporting studs in in the middle part, I decided to not put them flush with the legs, as I would definitely stumble upon them and they would be in the way. Instead I put the lower one in the center, and the upper one a little further out for more stability, as the lower one would be more prone to be in the way of my feet.

I also considered several strategies for creating the mortises. On a soft wood like spruce, using a chisel alone is not very easy. After some experimenting, i ended up using the following method:
- Marking up exactly where the mortise should be
- Drilling three holes (edge and center)
- Using an oscillating saw to create a cut along the length lines of the mortise
- Finally, cleaning up the rest with a chisel
I aimed for a mortise that was slightly too tight, and then using a file to expand it as needed.
I also struggled a bit to make square corners, until I realized that it was easier to just keep the rounded corners created by the initially drilled holes, and then using a file to round off the tenons instead.
After creating and dry-fitting all 24 mortises with their respective tenons, I was finally ready to assemble the frame.
Minor hickup
When doing a test assembly of all the parts of the frame I realized I had cut two of the pieces 10cm/4 inches too short. I was really not in the mood to create 4 new tenons, so I decided to splice them instead. I cut them in the middle, created 2 new pieces of 10 cm /4 inches each, and used a drilling template to drill 5 holes (1 center and 4 corner holes) on each of the 4 surfaces. Then I put glue and wooden dowels in the holes and spliced the pieces. For extra support, I also screwed a scrap piece of wood on one side. This gave me the extra length I needed, and I could finally assemble the whole frame.

Another minor thing I did was to create a groove in the upper front piece and attach a t-track. I thought this might be useful for clamping stuff vertically. After all, you can never get enough clamping options! 🙂
After dry-fitting the whole frame, it ended up being so tight and sturdy that I did not see the need for gluing it at all. Instead, I added a couple of screws to each joint to lock it up. It ended up being very sturdy with no wobble or movement at all, and I was very satisfied with the result.
Adjustable legs
Since my garage floor is not completely level, I still ended up with a little bit of wobble on the table when putting it in the designated location. This would be easily fixed with an adjustable leg. I flipped the table around, and drilled one wide hole and another narrower one to fit a tee nut:

I made sure it fit, added some super glue into the hole, and then used a hammer to drive the nut in. Then I could simply mount an adjustable threaded furniture foot into the nut.


Of course, when flipping the table around, I realized I had modified the wrong leg, so I had to do it all over again. Well well, now it has twice the adjustability.

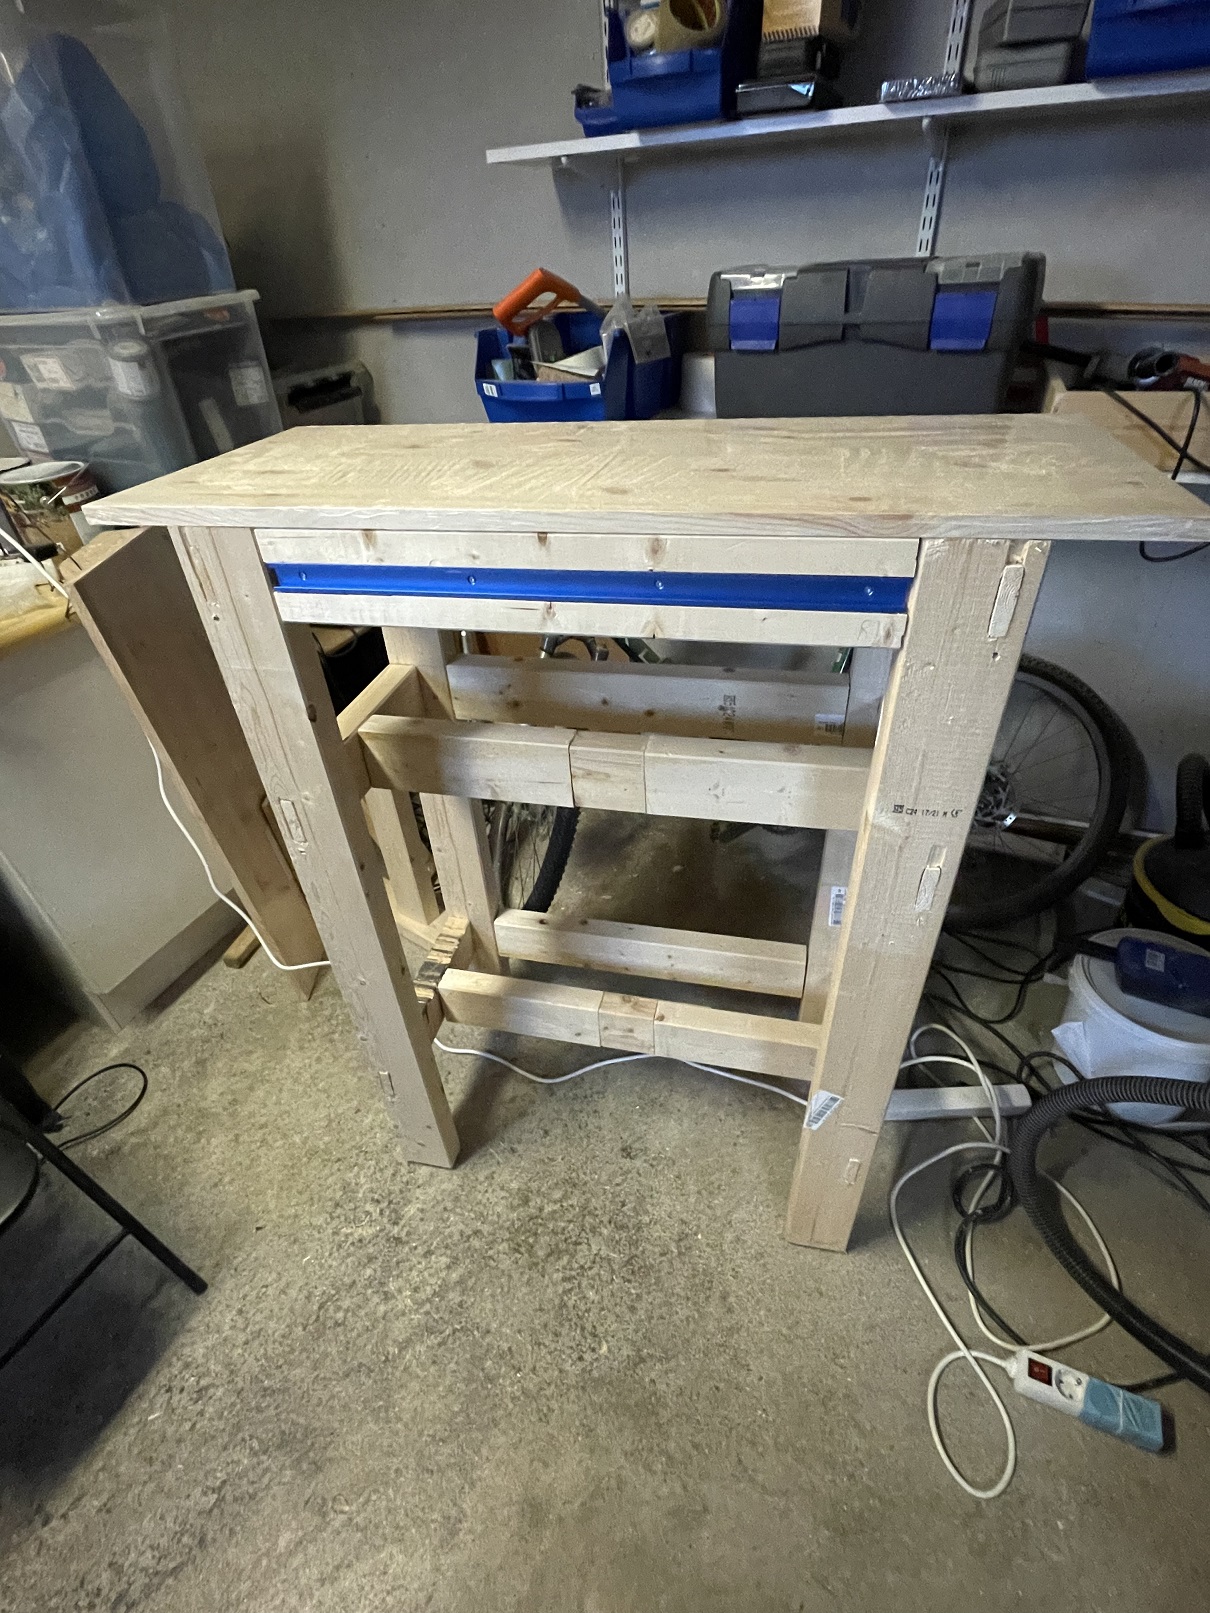
Router table frame ready

I put the edge-glued board I am planning to use as the table top loosely on top just to see how it would look, and I think it will work fine. It is not the most beautiful router table in the world, but the most important thing is that it is sturdy. Later I might add some panels to hide what’s inside, and maybe some finish as well.
Next steps for the router table
- Create the router lift system
- Customize the table top and router insert plate
- Create the fence and clamping system
Check out part II